Walk into any camera shop or browse online and you will find tripods in every shape imaginable. Tall aluminum models, compact travel designs, flexible legs, tabletop stands, and hybrids that double as handheld grips. It is easy to assume the biggest or most feature-packed option is automatically the best, but that logic leads plenty of photographers to buy a tripod they rarely carry.
The right tripod is not the one with the longest feature list. It is the one that fits the way you actually shoot, where you go, and how much you are willing to carry. This guide is for beginners buying a first tripod, hybrid creators who switch between photos and video, and travel or hiking photographers who care about every bit of weight in their pack. Instead of a generic rundown of features, it starts with your shooting habits and works backward to the design that suits them, so the tripod you choose ends up on location rather than in a closet.
Start With Your Shooting Habits, Not the Spec Sheet
Before comparing models, think honestly about the last few months of shooting. Where were you? What did you photograph? How often did you wish your camera was steadier, and in what situations did that happen? Those answers point you toward the right design far more reliably than any product description.
Browsing a wide range of Camera Tripods makes much more sense once you have defined a few priorities: the camera and lens you will mount most often, whether you need eye-level height, how far you walk with your gear, and whether video matters as much as stills. A landscape photographer hiking long trails has very different needs than a creator filming at a desk, and both differ from a parent who simply wants steady family photos on vacation.
A helpful exercise is to write down the three situations where you most often wish you had support. Maybe it is dim restaurants, sunset beaches, and recording tutorials at home. Maybe it is forest trails, waterfalls, and night skies. Once you see the list, patterns appear quickly, and the design that covers most of those moments usually becomes obvious before you even compare brands or models.
Matching Tripod Designs to Real Situations
Most tripods fall into a few broad families. Each one solves a particular problem well and compromises somewhere else, so the goal is to pick the compromise you can live with.
Full-Size Tripods for Landscapes and Long Exposures
Traditional tripods with telescoping legs and a center column give you eye-level height and a stable base on open ground. They are the go-to option for sunrise landscapes, astrophotography, architecture, and any long exposure where the slightest movement shows up in the image. The tradeoff is size. If a tripod stays in the car because it is too bulky to hike with, its stability does not help you. Look for leg locks you can operate quickly with cold hands and feet that grip both rock and soft ground.
Compact and Flexible Tripods for Travel and Everyday Carry
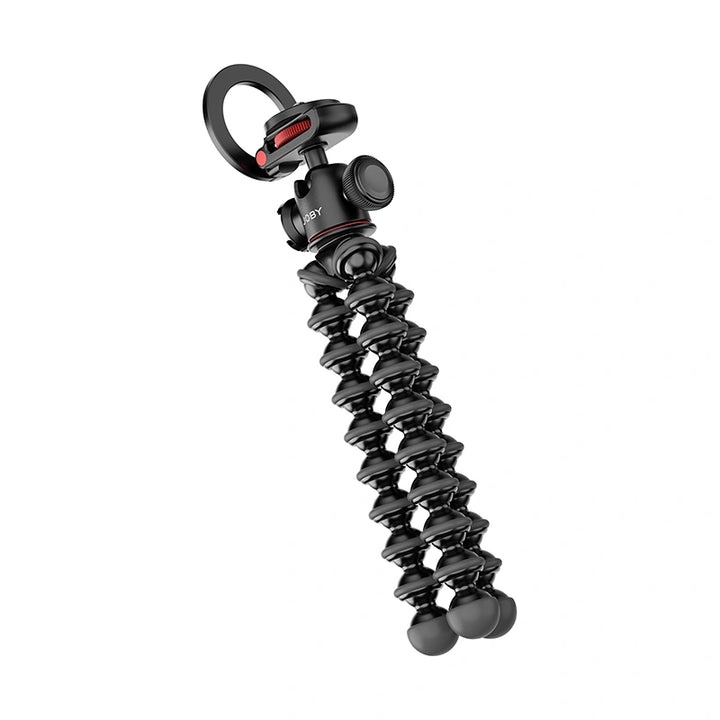
Compact tripods and flexible-leg designs trade height for portability and creative placement. Flexible legs can wrap around railings, fences, and branches, which means you are not limited to flat ground. They fit into small bags and are light enough to bring every day, which is exactly why many people end up using them more often than a full-size tripod. JOBY is well known for this style of support, and it shines for city travel, vlogging, and mirrorless or smartphone setups.
Tabletop and Hybrid Grips for Content Creators
If you mostly film at a desk, in a kitchen, or while walking and talking, a tabletop tripod that folds into a handheld grip covers both situations. It holds the camera at a natural height for seated recordings, then becomes a handle for walking shots. Adding a phone clamp or a cold shoe accessory mount lets you bring a microphone or light along without extra stands cluttering the space.
Features That Make a Real Difference
Once you have picked a design family, a handful of details separate a tripod you enjoy using from one that frustrates you every time you set it up:
- A head that suits your work: ballheads for quick photo adjustments, fluid or pan heads for smooth video movement.
- Quick-release plates so you can move the camera between tripod, grip, and bag in seconds.
- Load capacity with comfortable headroom above your heaviest camera and lens combination.
- Legs and locks that feel secure without needing to be over-tightened.
Capacity deserves special attention. A tripod working near its limit will creep and vibrate, especially with longer lenses. Choose one rated well above what you plan to mount, and remember to include accessories like microphones, lights, and filters in the total weight you are asking it to hold.
Balancing Weight, Height, and Durability
Every tripod decision eventually comes down to a balance between how tall it goes, how much it weighs, and how well it survives rough use. Taller tripods need longer or more leg sections, which adds weight and setup time. Lighter materials make carrying easier but can transmit more vibration in wind. More leg sections mean a shorter folded length but more locks to open and more places for flex to creep in.
Instead of chasing the tallest or lightest option, decide which of these three matters most for your work and accept a sensible compromise on the others. A hiker might prioritize low weight and accept a shorter working height. A studio or architecture photographer might prioritize height and rigidity because the tripod rarely leaves the car. For travel, a compact design that fits in a carry-on often beats a taller model that has to be checked or left at home.
When One Tripod Is Not Enough
Many photographers find that a two-tripod approach covers far more ground than one compromise model. A sturdy full-size tripod handles planned landscape and night sessions, while a small flexible or tabletop tripod lives permanently in an everyday bag. The small one gets used constantly for spontaneous moments, and the big one comes out when the shot truly demands it.
Setting Up for Sharp Results Every Time
Even a well-chosen tripod needs good technique. Extend the thicker upper leg sections before the thinner lower ones, since thicker sections are stiffer. Raise the center column only as a last resort, because it is the least stable part of most tripods. On uneven ground, adjust leg lengths until the base is level rather than compensating entirely with the head.
Trigger the shutter with a remote, an app, or the self-timer to avoid shake from pressing the button. Turn off lens stabilization when the camera is on a firm tripod if your camera maker recommends it, as some systems can introduce slight drift. In wind, hang your bag from the center hook if your tripod has one, or shield the camera with your body. These small steps turn a good tripod into a reliably sharp one, whether you are shooting a mountain sunrise or a product demo on your kitchen table.
Finding a Tripod You Will Actually Carry
The best tripod for you is the one that fits your real shooting life. Start by looking at where you go, what you shoot, and how much you are willing to carry, then choose the design family that solves those specific problems. Full-size tripods deliver height and solid stability for landscapes and long exposures. Compact and flexible models bring support into places a traditional tripod cannot reach and are light enough to carry every day. Tabletop grips cover desk recordings and walking shots in one tool. From there, pick a head that suits photos or video, insist on a quick-release system, and leave generous room in load capacity. Pair the tripod with good technique, from extending thicker leg sections first to using a remote shutter. Many photographers eventually own more than one type, and that is perfectly fine. Choose thoughtfully, and your tripod becomes a tool you reach for, not one you leave behind.
