Walk into any modern building, look at any digital display, or glance at the indicator lights on your home appliances, and you’ll see LEDs at work. Light Emitting Diodes have revolutionized the way we light our world — they’re energy-efficient, long-lasting, compact, and incredibly versatile. But behind every LED product, from a simple indicator light to a massive outdoor display screen, is a carefully engineered and precisely manufactured LED PCB assembly. In this article, we’ll explore what LED PCB assembly is, how it works, what makes it unique, and why it plays such a critical role in modern electronics and lighting design.
What Is LED PCB Assembly?
LED PCB assembly refers to the process of mounting and soldering LED components — along with any supporting electronic components — onto a printed circuit board (PCB) to create a functional LED-based electronic module or product.
While the basic concept is similar to standard PCB assembly, LED PCB assembly has its own unique set of requirements and challenges. LEDs generate light and heat simultaneously, and managing that heat effectively is one of the central concerns in LED PCB design and assembly. A poorly designed or assembled LED PCB can result in reduced brightness, color shifts, shortened lifespan, or complete failure of the LEDs.
LED PCBs are used in an enormous range of applications — from the backlight of your laptop screen and the headlights of an electric vehicle, to stadium lighting rigs, horticultural grow lights, architectural accent lighting, and the tiny notification LEDs on your smartwatch.
Types of LED PCBs
Not all LED PCBs are the same. Different applications call for different board types, each with its own characteristics:
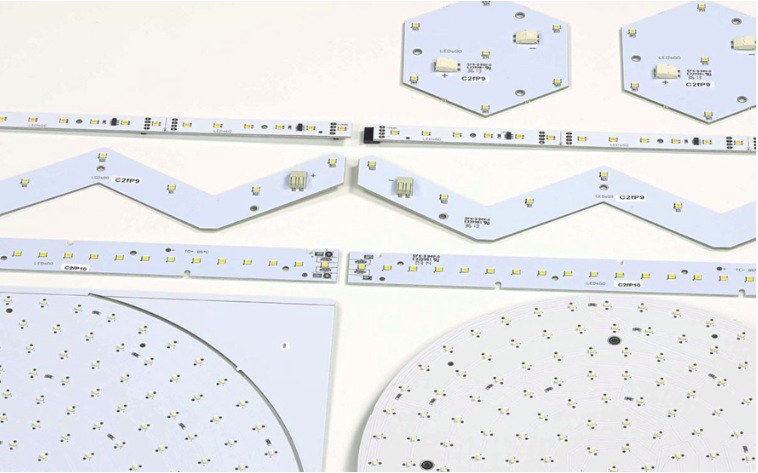
Aluminum PCBs (Metal Core PCBs) Aluminum PCBs are by far the most common substrate used in LED applications. Unlike standard FR4 fiberglass boards, aluminum PCBs have a metal core that conducts heat away from the LEDs far more effectively. This is critical because LEDs — especially high-power LEDs — generate significant heat at the junction, and excessive heat is the primary cause of LED degradation and failure.
The structure of an aluminum PCB typically consists of a copper circuit layer on top, a thermally conductive dielectric insulation layer in the middle, and an aluminum base at the bottom. This construction allows heat to flow efficiently from the LED through the dielectric layer and into the aluminum base, where it can be dissipated into the surrounding environment or through an attached heatsink.
FR4 PCBs Standard FR4 boards are used for low-power LED applications where heat generation is minimal — such as indicator lights, decorative lighting, or status LEDs on consumer electronics. FR4 is less expensive than aluminum but provides far less thermal conductivity, making it unsuitable for high-power LED applications.
Flexible PCBs Flexible PCBs — made from polyimide or similar flexible materials — are used in LED strip lights, wearable devices, and applications where the board needs to bend or conform to a curved surface. LED flex PCBs are popular in architectural and decorative lighting, where they can be wrapped around curved structures or installed in tight spaces.
Ceramic PCBs For the most demanding high-power LED applications — such as high-intensity industrial lighting or specialty medical and scientific equipment — ceramic PCBs offer superior thermal conductivity and stability compared to aluminum. They are more expensive but deliver excellent performance in extreme operating conditions.
The LED PCB Assembly Process
LED PCB assembly follows the same fundamental steps as standard PCB assembly, but with additional attention to thermal management, component placement precision, and optical considerations. Here’s how the process typically works:
Step 1: PCB Design and Review The foundation of a successful LED PCB assembly is a well-thought-out design. Engineers must consider not just the electrical circuit but also the thermal pathway — how heat will flow from each LED through the board and into the surrounding environment. The placement of LEDs, the width of thermal vias, the choice of substrate material, and the design of copper pours all affect thermal performance.
Before manufacturing begins, the design goes through a DFM (Design for Manufacturability) review to identify any potential assembly issues and ensure the board can be produced reliably and consistently.
Step 2: PCB Fabrication The bare PCB is fabricated according to the design files. For aluminum PCBs, this involves laminating the copper circuit layer and dielectric insulation layer onto the aluminum base, followed by imaging, etching, drilling, and surface finishing — similar to standard PCB fabrication but adapted for metal core materials.
Step 3: Solder Paste Application Solder paste is applied to the LED solder pads and any other component pads using a metal stencil. For LED PCBs, the solder paste type and application volume are particularly important — too little solder can result in poor thermal contact between the LED and the board, increasing junction temperatures and shortening LED life.
Step 4: LED and Component Placement LEDs and other components are placed onto the solder paste using automated pick-and-place machines. Precision is critical in LED assembly — not just for electrical connectivity, but for optical performance. The alignment and orientation of LEDs directly affect the light output pattern, color uniformity, and overall appearance of the finished product.
For high-power LEDs and chip-on-board (COB) LED modules, some assembly steps may be performed manually by skilled technicians, particularly when working with very large or irregularly shaped components.
Step 5: Reflow Soldering The populated board passes through a reflow oven, where the solder paste melts and forms permanent connections. The reflow temperature profile must be carefully controlled for LED PCBs — particularly aluminum boards, which have high thermal mass and conduct heat differently from standard FR4 boards. An incorrect temperature profile can result in cold solder joints, damaged LEDs, or delamination of the aluminum board’s layers.
Step 6: Inspection and Testing After soldering, LED PCBs undergo both visual and functional inspection. Automated Optical Inspection (AOI) checks for solder defects and misplaced components. Functional testing verifies that all LEDs illuminate correctly, that light output meets specifications, and that the board draws the correct amount of current.
For lighting products, additional photometric testing may be carried out to measure luminous flux, color temperature, color rendering index (CRI), and beam angle — ensuring the product meets its optical performance specifications.
Step 7: Potting or Conformal Coating (if required) For LED PCBs used in outdoor, industrial, or harsh-environment applications, a conformal coating or potting compound may be applied after assembly to protect the board against moisture, dust, vibration, and chemical exposure. This is particularly important for exterior architectural lighting, automotive lighting, and marine applications.
Key Challenges in LED PCB Assembly
LED PCB assembly presents several unique challenges that manufacturers must address to produce reliable, high-quality products:
Thermal Management As mentioned, heat is the enemy of LED performance and longevity. Every aspect of the assembly process — from solder paste volume to reflow profile to the quality of the thermal interface between the LED and the board — affects how efficiently heat is managed. Poor thermal management leads to LED color shift, lumen depreciation, and premature failure.
Optical Precision LEDs are optical devices as well as electronic ones. Even small misalignments in component placement can cause uneven light distribution, visible hot spots, or color inconsistencies in the finished product. High-precision pick-and-place equipment and rigorous inspection processes are essential.
ESD Sensitivity LEDs — particularly high-brightness and UV LEDs — can be sensitive to electrostatic discharge (ESD). Proper ESD control measures, including grounded workstations, ESD-safe packaging, and ionizers, must be in place throughout the assembly process to prevent invisible damage that only manifests as early failure in the field.
High-Power Component Handling High-power LEDs require careful handling during assembly. Their large thermal pads must make intimate contact with the board’s thermal layer to ensure efficient heat transfer. Any voids in the solder joint beneath a high-power LED can create thermal hotspots that dramatically shorten its lifespan.
Color Consistency In applications where multiple LEDs are used together — such as LED panels or architectural lighting — matching the color and brightness of individual LEDs is important. This is achieved through careful component binning (selecting LEDs with closely matched specifications) and precise assembly processes.
Applications of LED PCB Assembly
The range of products that rely on LED PCB assembly is vast and continues to grow:
General and Commercial Lighting: LED downlights, panel lights, tube lights, and streetlights all use LED PCBs as their light source, replacing traditional fluorescent and incandescent lamps with far more energy-efficient alternatives.
Automotive Lighting: Modern vehicles use LED PCBs for headlights, tail lights, interior ambient lighting, dashboard displays, and turn signals. The automotive environment demands LEDs that can withstand vibration, temperature extremes, and moisture.
Display Technology: LED backlights in TVs, monitors, and smartphones, as well as direct-view LED video walls and scoreboards, all rely on precisely assembled LED PCBs.
Horticultural Lighting: LED grow lights for indoor farming and greenhouse cultivation use specially designed LED PCBs that emit specific wavelengths of light optimized for plant growth.
Medical and Scientific Equipment: UV LEDs for sterilization, infrared LEDs for imaging systems, and high-intensity LEDs for surgical lighting all require specialized LED PCB assembly with exacting quality standards.
Consumer Electronics: Indicator lights, notification LEDs, keyboard backlighting, and decorative lighting in consumer products all use LED PCBs in various forms.
Conclusion
LED PCB assembly is a specialized and increasingly important segment of the electronics manufacturing industry. As LED technology continues to advance — with higher efficiency, greater brightness, and new form factors — the demands placed on PCB assembly processes continue to evolve as well. Getting LED PCB assembly right requires a deep understanding of both electronics manufacturing and the unique thermal and optical requirements of LED components. For companies looking to produce high-quality LED products at competitive prices, partnering with a trusted China LED PCB assembly provider offers access to advanced manufacturing facilities, experienced engineering teams, rigorous quality control processes, and the production scale needed to meet the growing global demand for LED-based lighting and electronics.
